Add i-case dialog box
This topic provides an overview of the Add i-case dialog box and all the settings and buttons on it. However if you require step-by-step procedures on creating i-cases (intercept cases) refer to To create an i-case.
This feature requires option E14 Sentinel. If you do not have this option this feature is not available.
The Add i-case dialog box is opened from the Case menu, Person menu and Phone menu on the View i-cases screen. It allows you to add an i-case to the selected case, person or phone.
NOTE: When you are creating an i-case, although not mandatory, it is strongly recommended that you enter a Person name and Phone number. This means you can benefit from all OSS-ESPA features.
However OSS-ESPA does offer the flexibility of allowing you to create your i-case without entering these.
NOTE: In the United States, law enforcement agencies require authorization to perform intercepts. Within each legal authorization there is information contained in the intercept that may or may not be authorized for analysis. OSS-ESPA automatically minimizes information that is sent by the operator if you do not select it as being authorized for the i-case. You must use the settings available to authorize the intercept so that you can analyze the data that has been authorized. These settings are: Location, Post cut thru digits, Text message, Voice and Data.

This setting is optional. Enter the operator of the phone number.
This setting is not displayed if Automatically add CASEID (LIID) by prefix/suffix is selected.
If displayed this setting is mandatory. Enter the CASEID (LIID) Lawful Interception IDentifier provided by the operator.
For each target identity related to an interception measure an CASEID (LIID) is assigned by the operator which consists of alphanumeric characters or a digit string. It is assigned by the operator to a specific law enforcement agency and may for example contain a lawful authorization reference number, and the date, when the lawful authorization was issued.
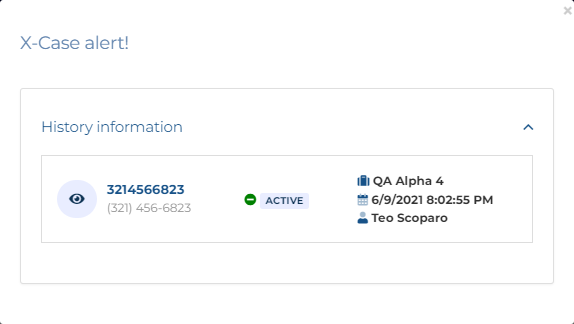
If the CASEID (LIID) is being used in another case then the following alert is displayed notifying you of the case details.
This is also used to identify the i-case on OSS-ESPA screens although you can specify another name to display if required using i-case name.
This setting is not displayed if Automatically add CASEID (LIID) by prefix/suffix is selected.
Enter a name for the i-case if you prefer to use a name rather than the CASEID (LIID). This is then used, rather than the CASEID (LIID), on the OSS-ESPA screens to identify the i-case.
This setting is strongly recommended but it is optional. Enter the name of the person who the i-case is for or select from the menu one that is already available in the case. If you enter a name then the i-case is structured to the person. If you do not enter a name then the i-case is structured directly to the case.
Note, if you open this dialog box from an existing person or phone then this setting is automatically populated and cannot be changed.
This setting is strongly recommended but it is optional. Enter the phone number which the i-case is for or select from the menu one that is already available in the case. If you enter a phone number then the i-case is structured to the phone number and if you have not entered a person name then one is automatically created using the phone number. If you do not enter a phone number then the i-case is structured directly to the person if you entered a person name, or to the case if you did not enter a person name.
Note, if you open this dialog box from an existing person or phone then this setting is automatically populated and cannot be changed.
This setting is only displayed if your administrator has configured prefixes or suffixes for the selected operator.
Select if you want to automatically specify the CASEID (LIID) using the phone number and the configured prefixes and suffixes.
All the CASEID (LIID) prefixes and suffixes that your administrator has configured for the selected operator are listed. If Automatically add LIID by prefix/suffix is selected then these prefixes and suffixes are appended to the phone number to automatically specify the CASEID (LIID) so that you do not have to enter it manually in the CASEID (LIID) setting. The "blank" prefix and suffix is used if you want the phone number to be used as the CASEID (LIID).
This setting is only displayed if your administrator has configured suffixes for the selected operator.
This lists all the CASEID (LIID) prefixes and suffixes that your administrator has configured for the selected operator. If Automatically add LIID by prefix/suffix is selected then this prefix and suffix is appended to the phone number to automatically specify the CASEID (LIID) so that you do not have to enter it manually in the CASEID (LIID) setting. The "blank" prefix and suffix can be used if you want the phone number to be used as the CASEID (LIID).
Enter the court authorization identifier. This is then displayed on the Evidence Management and Reporting screen and included in the reports.
This displays the timezone of your OSS-ESPA system.
NOTE: When entering the Valid From and Valid To date you must take into consideration the timezone of date/time on the warrant versus the timezone of your OSS-ESPA system. The timezone of your system is displayed above these settings. For example, if the timezone displays "Eastern Standard Time (-5.00)", and the warrant's date/time is in Eastern Standard Time then you must enter the warrant's date/time in Valid From and Valid To. However, if your warrant is in Pacific Standard Time then you must increase the time entered in the Valid From and Valid To settings by 3 hours.
Select the time period you want the CASEID (LIID) to be active for. 30 days is a typical time period that a judge will set for interception.
- To set the Valid From date either use the date/time picker or click Now to select the current date.
- To set the Valid To date either use the date/time picker or select the number of days you want it to be active for then click
 .
.
Note, the CASEID (LIID) is also automatically deactivated if a case is closed.
NOTE: When entering the Valid From and Valid To date you must take into consideration the timezone of date/time on the warrant versus the timezone of your OSS-ESPA system. The timezone of your system is displayed above these settings. For example, if the timezone displays "Eastern Standard Time (-5.00)", and the warrant's date/time is in Eastern Standard Time then you must enter the warrant's date/time in Valid From and Valid To. However, if your warrant is in Pacific Standard Time then you must increase the time entered in the Valid From and Valid To settings by 3 hours.
Select the path you want used to store the Sentinel case data. This is especially important for jurisdictions that are required to physically store evidence in the authorizing jurisdiction of the legal demand. The options that are available to you were configured by your administrator who also defines which data is archived and when.
Select the path you want used to store a backup of the Sentinel case data. This is especially important for jurisdictions that are required to physically store evidence in the authorizing jurisdiction of the legal demand. The options that are available to you were configured by your administrator who also defines which data is archived and when.
If you want to add a new court authorization, then edit the court authorization id, valid to/from dates and the evidence storage then click this button. The new data is added to the table.
Note, this does not save any changes you make to Location, Post cut thru digits or Content.
If you want to update the current court authorization id, valid to/from dates or the evidence storage then edit them then click this button. The data is updated in the table.
Note, this does not save any changes you make to Location, Post cut thru digits or Content.
Select if you have been authorized to analyze the location data in the intercepts provided by the operator. For example location data can include cell site or geo-location information such as the GPS coordinates. If this setting is not selected then OSS-ESPA minimizes any location data in the intercepts for the CASEID (LIID).
Select if you have been authorized to analyze the digits the phone user dialed after the call was connected. For example this could be the digits dialed on the phone when the phone user was calling an automated bank number and inputting their PIN or passcode. If this setting is not selected then OSS-ESPA minimizes all text message content in the intercepts it receives for the CASEID (LIID).
Select if you have been authorized to analyze the voice content in the message provided by the operator. If this setting is not selected then OSS-ESPA minimizes all voice message content in the intercepts it receives for the i-case.
When this is selected you must also select the audio delivery method, either VoIP or an analog line.
Select if you have been authorized to analyze the actual body of the text message provided by the operator. For example text message content can include text, photos and videos. If this setting is not selected then OSS-ESPA minimizes all text message content in the intercepts it receives for the i-case.
Select if you have been authorized to analyze the data content in the message provided by the operator. For example the Web sites visited and IP addresses. If this setting is not selected then OSS-ESPA minimizes all data content in the intercepts it receives for the i-case.
Click to select all the intercept authorization check-boxes.
Click to clear all the intercept authorization check-boxes.
Click to apply any changes you have made. The dialog box closes automatically.
Click to close the dialog box without making any changes and to return to the View i-cases screen. If you are a monitor supervisor then a message appears giving you the option to add a monitor on the Create new monitoring queue screen and Editing queue screen.